How to Make a Gift Bag Out of Wrapping Paper: A Step-by-Step Guide
Transforming a simple sheet of wrapping paper into a custom gift bag isn’t just a clever craft; it’s an opportunity to make your presents truly unforgettable. Whether you’re wrapping a birthday surprise, a holiday treat, or a “just because” gift, this eco-friendly DIY project is the perfect blend of creativity, sustainability, and personal touch.
Forget ill-fitting, expensive store-bought bags. Below, we break down everything you need to know about how to make a gift bag out of wrapping paper, creating durable, personalized bags that will wow any recipient.
Why Make Your Own Wrapping Paper Gift Bags?
Eco-Conscious & Budget-Friendly: Give leftover paper and neglected rolls a second life. Crafting your own bags reduces waste and saves money. A single roll of wrapping paper can yield 5-10 bags, saving you a significant amount compared to store-bought options.
The Perfect Fit, Every Time: Customize the size for oddly shaped gifts like wine bottles, board games, or plush toys. No more struggling!
A Truly Personal Touch: Reflect the recipient’s personality with patterns and colors. As top interior designer Emily Henderson notes, a handmade touch tells a story before the gift is even opened.
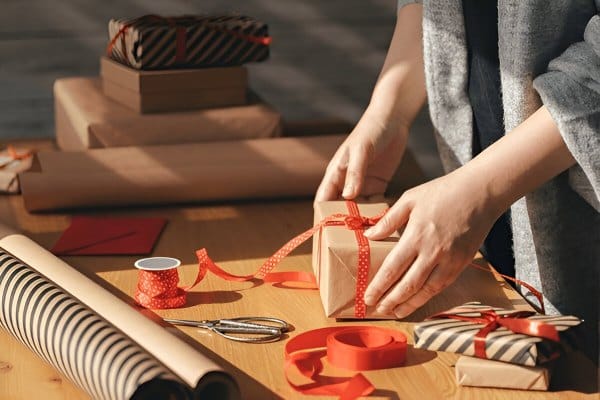
What You’ll Need: The Essential Toolkit
- Wrapping Paper: Opt for thick, durable options. Kraft paper is great for a rustic vibe, while metallic or glossy paper is perfect for holidays.
- Scissors & Double-Sided Tape: For clean, seamless edges.
- Ruler: To make crisp, straight folds.
- Hole Punch & Ribbon: For creating sturdy handles. Satin ribbon adds elegance, while twine offers a farmhouse feel.
- Optional Cardboard: A small piece to reinforce the base for heavier items like books or candles.
How to Make a Gift Bag: The 4-Step Method
Follow these simple steps for a perfect bag every time.
Step 1: Cut Your Paper to Size
Lay your wrapping paper design-side down. The key is to cut a rectangle.
- Height: The height of your paper should be the desired height of your bag, plus about 2-3 inches for the bottom fold.
- Width: The width should be slightly more than double the desired width of your bag.
- Beginner Hack: If you’re unsure, simply trace a store-bought bag you already have as a perfect template.
Step 2: Create the Body of the Bag
With the paper still design-side down, fold the left and right edges inward so they overlap by about half an inch in the center. Secure this seam with a clean line of double-sided tape.
Step 3: Form the Base
Fold the bottom edge upward by 2-3 inches (this will become the base). Open this folded section and flatten the corners to create a diamond shape. Then, fold the top and bottom points of the diamond toward the center, overlapping them. Secure them firmly with tape. For a heavy-duty upgrade, glue your pre-cut cardboard rectangle inside onto the base.
Step 4: Add Handles and Finishing Touches
Fold the top edge of the bag inward by about an inch to create a reinforced cuff. Punch two holes through this cuff on each side. Thread your ribbon through the holes from the outside in, and tie knots on the inside to secure the handles.
Creative Ideas to Elevate Your Design
- Luxury Lining: Line the interior with a contrasting piece of tissue paper or gold foil for a high-end feel before you add the gift.
- Natural Handles: Swap ribbon for braided jute rope, dried vines, or recycled fabric strips for a unique, textural element.
- Upcycled Accents: Glue on vintage buttons, broken jewelry pieces, or pressed flowers for whimsy and charm.
- Go Green: Use plantable seed paper for a gift bag that blooms! According to a study in the Art Therapy Journal, repetitive crafts like folding can also be a great stress-reducer.
Troubleshooting Common Issues
- Weak Seams? Add a few dots of hot glue for extra security.
- Torn Paper? Patch small holes with a contrasting paper shape (like a heart or a star) for a cute, “visible mending” look.
- Uneven Handles? Always use a ruler to measure your hole placement before punching.
Conclusion: More Than Just a Bag
Learning how to make a gift bag out of wrapping paper is more than just a craft it’s a statement. It’s about celebrating thoughtfully, reducing waste, and adding a personal flourish that no store-bought option can match. So grab your scissors, unleash your creativity, and let every gift you give carry a little piece of your heart.
What is the best paper to use for making gift bags?
The best paper is a medium to heavyweight wrapping paper. Thicker papers like kraft, foil, or high-quality glossy paper are less likely to tear and will create a sturdier bag. Avoid very thin, cheap paper.
How do you make a gift bag without tape?
You can make a gift bag without tape by using a strong glue stick or a hot glue gun to secure the seams. For a no-glue, no-tape option, you can use intricate folding techniques similar to origami, but this is a more advanced method.
Can you make a gift bag from fabric?
Yes, absolutely! The same principles of folding and securing seams apply. You can use fabric glue or a sewing machine to create reusable fabric gift bags, which are a fantastic zero-waste option.
How do you reinforce the bottom of a paper bag?
The easiest way is to cut a piece of thin cardboard (from a cereal box, for example) to the exact size of the bag’s base and place it inside. This distributes the weight of the gift and prevents the bottom from sagging or breaking.


2 thoughts on “ How to Make a Gift Bag Out of Wrapping Paper (Easy!)”