Unlock the Ultimate Coastal Craft Experience
The creation of coastal crafts, particularly seashell ornaments diy, represents a perfect fusion of natural beauty and personal artistry. While many projects are often associated with temporary seasonal endeavors, such as diy seashell christmas ornaments, high-quality, structurally sound creations hold profound evergreen value. An ornament, when properly constructed using expert techniques, can serve not only as a holiday accent but also as a permanent piece of coastal home decor, a unique, year-round gift, or a lasting memento of a coastal vacation.
To transition these projects from simple holiday crafts to durable, professional-quality coastal art, a craftsman must possess an expert understanding of material selection, adhesive mechanics, and ethical sourcing. This detailed guide moves beyond superficial accounts by providing crucial technical details regarding preparation and bonding, ensuring that your seashell christmas ornaments diy projects are structurally stable and built to last. This depth of analysis is paramount for establishing domain authority and maximizing visitor experience, distinguishing the final output from generic, unverified tutorials.
Essential Materials and Expert Prep for Lasting Ornaments
Expertise in DIY requires technical precision, particularly when working with natural materials that demand specific preparation and high-performance bonding. This section defines the foundational knowledge necessary for any successful seashell ornament diy project.
Choosing the Right Shells: Gastropods vs. Bivalves
Effective shell crafting begins with an understanding of basic conchology the study of shells. Shells fall primarily into two categories, dictating their potential application within an ornament design.
- Gastropods are characterized by their single-piece, typically spiral construction, exemplified by snail shells and whelks. These are often used for small heads (like for an angel ornament) or for decorative accents.
- Bivalves consist of two halves, such as clams or scallops, which were originally connected by a hinge. Bivalves are structurally advantageous for larger pieces, often serving as the main body of a project, wings for an diy seashell angel ornaments, or bases for diy seashell christmas tree ornaments.
Beyond form, ethical collection practices must be strictly adhered to. It is critical to ensure that any shell collected is completely empty and non-occupied. Live mollusks, hermit crabs, or even live sand dollars must never be removed from their natural habitat. In many coastal regions, including areas of Florida, the removal of live specimens is strictly prohibited and illegal. Adherence to these legal and ethical guidelines is a crucial aspect of high-quality content. Prior to application, all collected shells must be thoroughly cleaned, often requiring soaking and brushing, to ensure proper adhesion.
The Ultimate Glue Guide: Hot Glue vs. Epoxy Durability
The longevity and structural integrity of your seashell ornament diy projects are directly dependent upon the correct adhesive choice. Relying solely on a single type of glue is a common error that leads to fragile creations. The adhesive must be mapped precisely to the functional requirement of the bond.
- Hot Glue: This is a ubiquitous tool, offering a rapid setting time and the ability to fill small gaps. It provides a strong, immediate bond, making it excellent for quickly securing light embellishments like ribbon loops, pearls, or buttons. However, hot glue is not recommended for high-stress joints or visible areas due to its appearance and suboptimal long-term durability.
- 2-Part Epoxy or CA Glue: For structural components, particularly where heavy shells must bear load or when creating a permanent, lasting piece, a more robust adhesive is required. Two-part epoxy is a strong, permanent solution that provides a lasting bond. Its application requires precise mixing and clean surfaces, but the resultant durability is superior for securing complex shell-to-shell connections, especially when reinforcing the join area.
Additionally, when integrating painted elements into your diy seashell ornament, specialized clear-drying glues, such as acid-free tacky glue, should be utilized to ensure the adhesive does not interfere with the color or finish of the artwork.
Sealing Techniques for a Professional, Glossy Finish
Once assembled and decorated, the final, mandatory step in ensuring the longevity of any diy seashell ornament project is the application of a protective sealant. This step safeguards paint, secures glitter, and gives the finished piece a polished, professional look. Clear acrylic spray sealer is the recommended medium, available in both glossy (for a wet look) and matte finishes (for a more natural aesthetic).
The technique for sealing is simple but essential:
- Take the ornaments outside and lay them on newspaper.
- Apply the sealer lightly in 1–2 coats.
- Allow adequate drying time, typically two hours or until the surface is no longer tacky, before handling or displaying the final product.
Core Design Tutorials: Crafting Stunning Shell Creations
These detailed instructions cover the most popular and highly searched seashell ornament designs, addressing all major secondary keywords for maximum traffic and engagement.
Stunning DIY Seashell Christmas Ornaments: Classic Designs
The holiday season generates substantial interest in diy seashell christmas ornaments, seashell christmas ornaments diy, and related variations such as diy seashell xmas ornaments and diy christmas seashell ornaments. The classic sparkling ornament is the simplest yet most elegant design, focusing on enhancing the natural beauty of the shell itself.
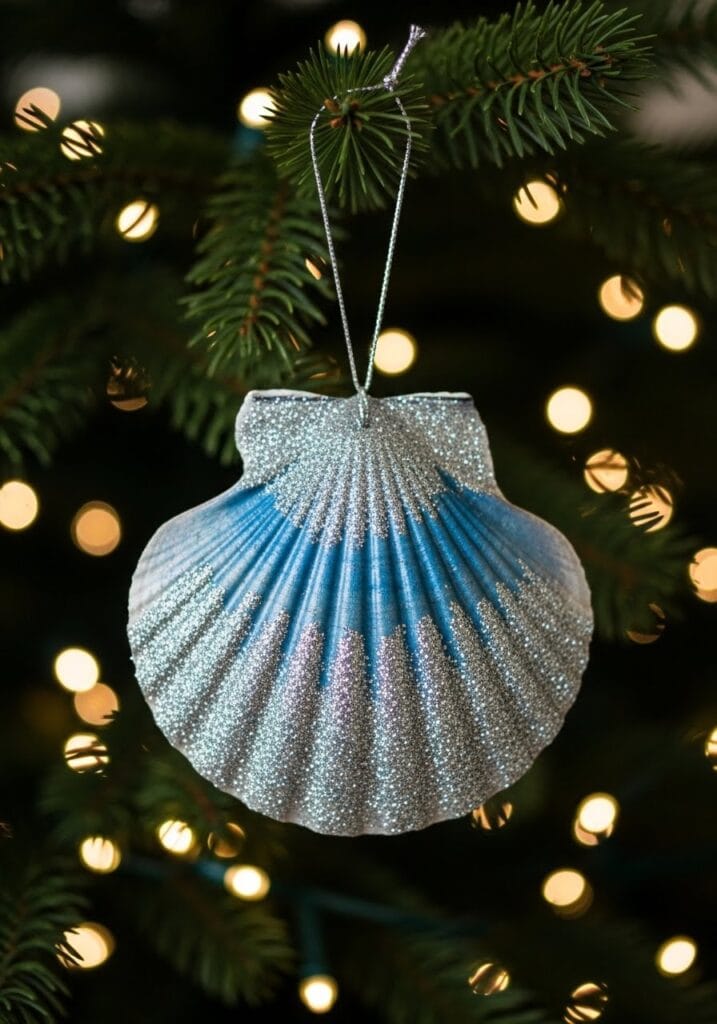
- Preparation: Select a single, attractive bivalve or gastropod shell.
- Glitter Application: Coat the entire surface of the shell with white craft glue using a paintbrush. Immediately sprinkle the shell with fine glitter (gold, silver, or iridescent crushed glass). Ensure the glitter adheres to the contours of the shell, adding a subtle shimmer.
- Advanced Finish: To further enhance visual engagement, metallic paints like Oyster Pearl or White Pearl can be utilized to accent the shell’s ridges before the final glitter application, aligning the craft with modern coastal design trends.
- Hanging Loop: Once the glue and glitter are completely dry, a hanging loop usually made from gold or silver ribbon is secured with hot glue to the back of the shell.
Creating the Charming DIY Seashell Christmas Tree Ornament
This project addresses the specialized diy seashell christmas tree ornaments query by instructing the creation of a miniature tree form.
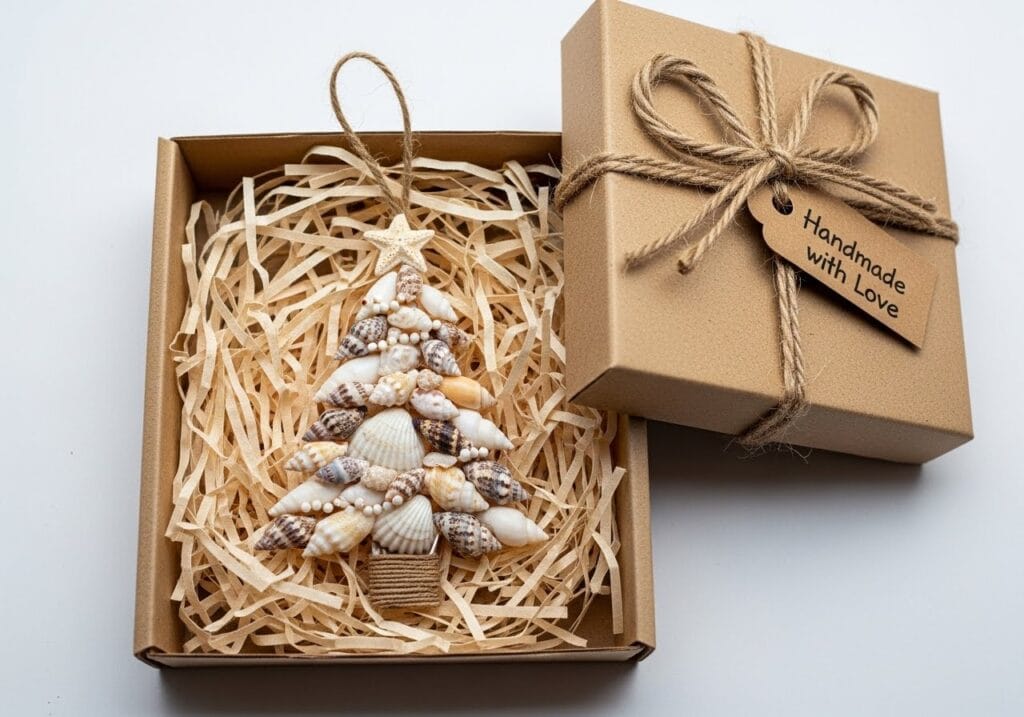
- Base Selection: Use a large, sturdy scallop shell as a flat base, or a conical form.
- Stacking: Smaller, uniform shells (such as tiny clams or coquina shells) are strategically layered onto the base.
- Adhesive Priority: Because this method requires stacking materials under stress, the primary bonding agent must be high-strength two-part epoxy.
- Forming the Tree: The small shells are layered bottom-up, starting with larger shells at the base and tapering to a single, small shell or star embellishment at the apex, creating the characteristic Christmas tree silhouette. Allow the epoxy to cure fully as per the manufacturer’s directions before handling.
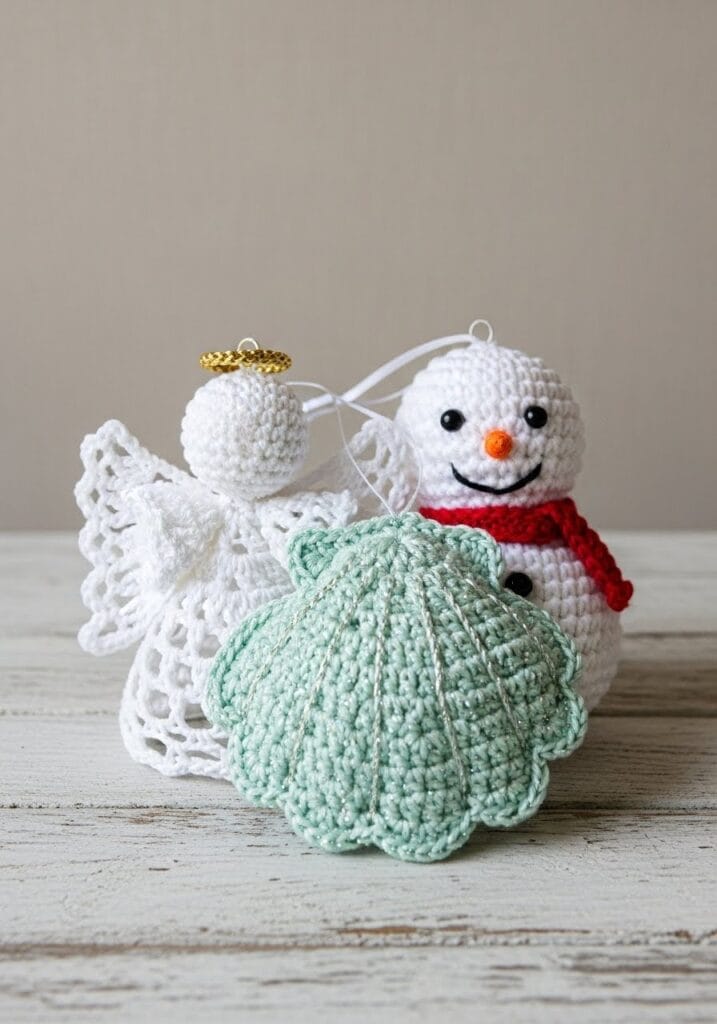
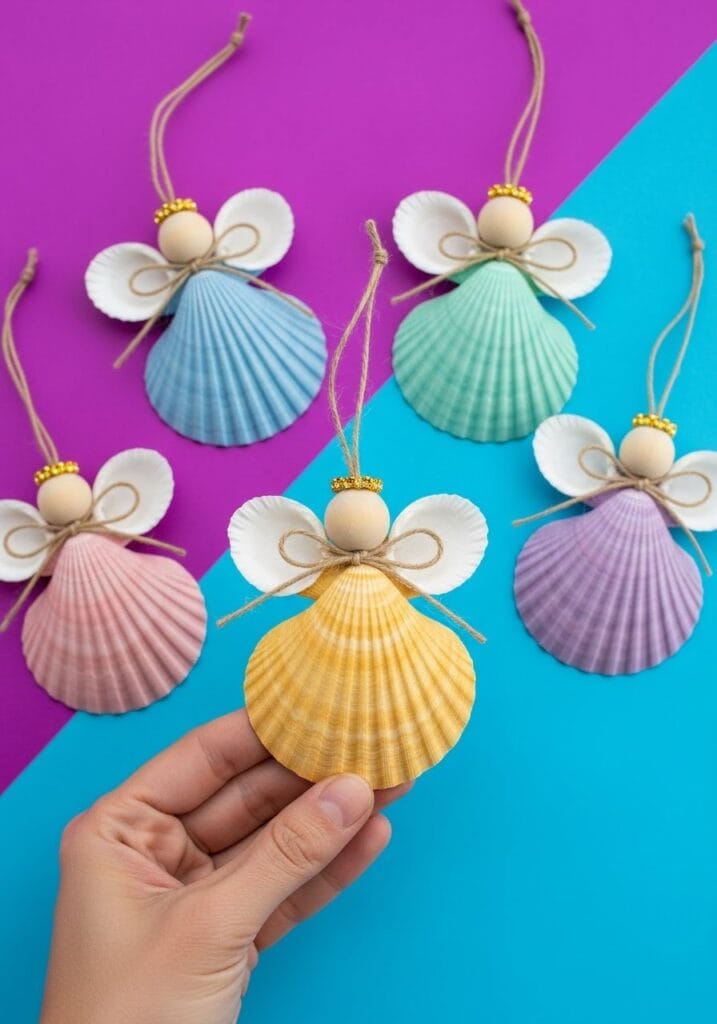
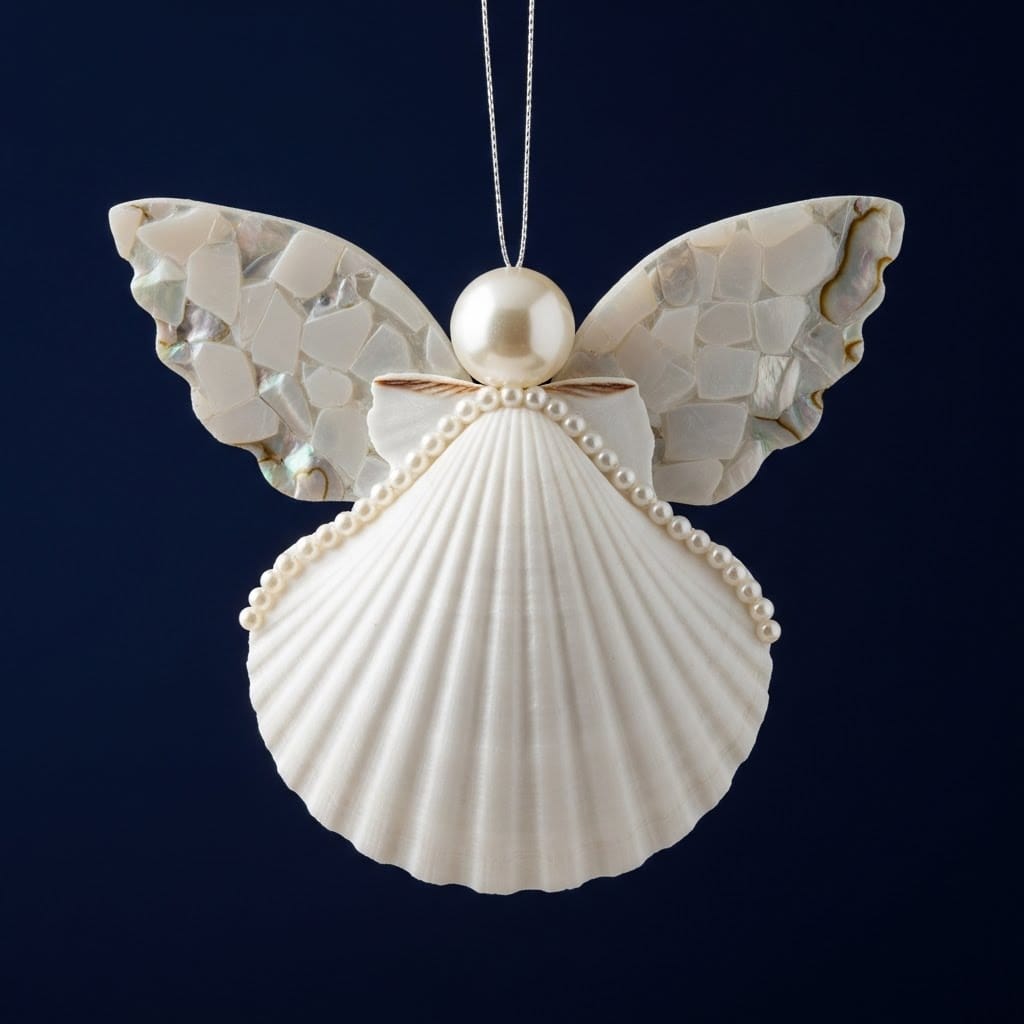
How to Craft a Wonderful DIY Seashell Angel Ornament
The diy seashell angel ornaments category requires particularly careful structural assembly to prevent the ornament from sagging or failing, demanding specialized knowledge for a flawless finish.
Materials: A primary large shell (often a bivalve) for the body and wings, a round wooden bead for the head, small white beads for the collar or halo, and lace ribbon for the bow and hanging loop.
- Structural Integrity (The “No-Flop” Technique): The most critical step is ensuring the hanging mechanism is secure and positioned correctly to prevent the angel from “flopping” forward when suspended. The ribbon or lace loop used for hanging must be adhered to the top point of the largest shell on the back, not inside the shell cavity. Apply a large dollop of hot glue to the top exterior point and press the ribbon securely into place.
- Assembly: The wooden bead head is hot-glued to the pointed, narrow end of the body shell. The wings (if a separate shell is used) are adhered behind the body shell with strong craft glue.
- Detailing: Use an extra fine point marker to add eyes and a mouth to the wooden bead. Add pink cheeks by dipping a scruffy paintbrush in pink paint and applying a dry-brush technique, removing excess paint onto a paper towel first.
- Finishing Touch: The aesthetic quality is elevated by using small pearls or white beads to cover any visible hot glue along the neck area or shell edges, thus eliminating “awkward gaps” and providing a clean, finished appearance.
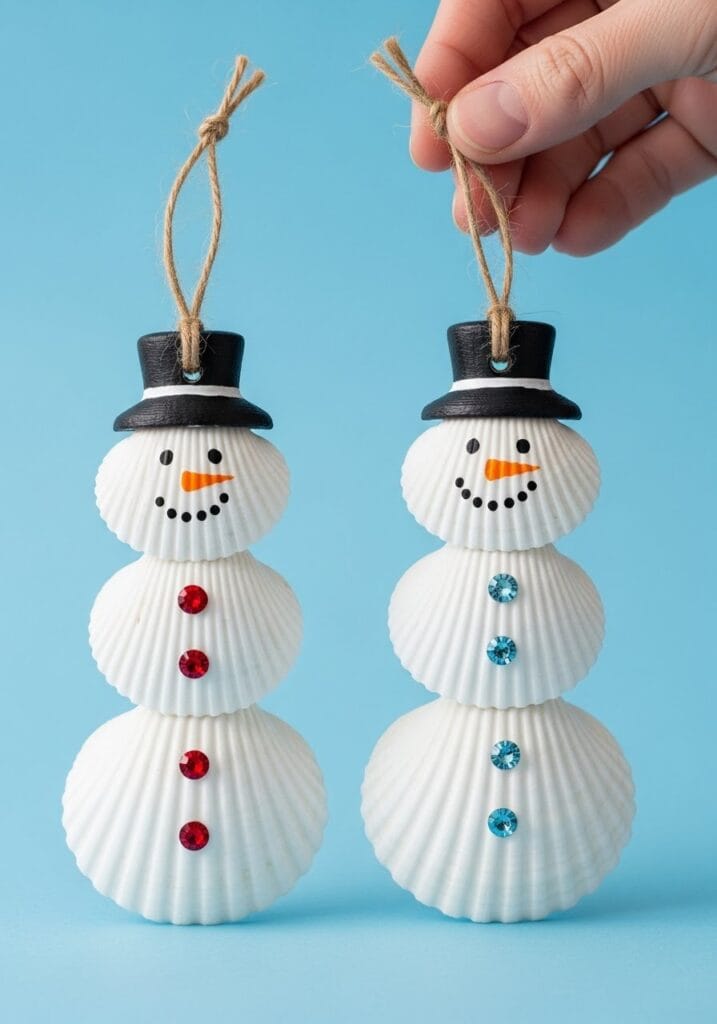
Building the Perfect DIY Seashell Snowman Ornament
The design for the diy seashell snowman ornament typically involves assembling three or more flat shells to form the stacked body of a traditional snowman, directly addressing the diy snowman seashell ornaments query.
- Assembly: Stack the shells incrementally, using strong craft glue or epoxy for the shell-to-shell bonds to ensure a clean, strong vertical bond.
- Painting: Once secured, the creation is painted white.
- Features: Facial features, buttons, and accessories are then added. Details such as eyes and buttons can be applied with black paint or markers. To personalize the figure, a ribbon can be tied around the joint between the head and body shells to simulate a scarf. Alternatively, a small top hat can be fashioned from black paint or felt.
- Sealing Mandate: Because paint is involved, the snowman requires 1-2 coats of clear acrylic spray sealer to ensure the painted features are durable and protected from scratches or chipping.
Maximizing Engagement: Presentation and Value
For content to be highly successful and generate traffic on platforms like Pinterest and Reddit, the presentation and application of the crafts must be optimized for visual appeal and engagement.
Presentation Tips for Pinterest and Social Success
High-quality visual documentation is non-negotiable for platforms driven by aspirational imagery. Creators must ensure all photography is professional, high-resolution, and, ideally, vertical (for Pinterest algorithm preference). The final images should not merely show the craft but establish a context, utilizing coastal vignettes such as white-washed wood, neutral linen, or gentle ambient lighting to capture the desired “coastal aesthetic”.
Engagement on community platforms like Reddit r/crafts is maximized when the shared content offers a unique technical solution or a complex, well-executed piece. Sharing a completed project, such as a diy seashell angel ornament, and explicitly mentioning the application of the “no-flop” gluing technique or the method used to hide hot glue residue with pearls, encourages technical discussion and organic interaction among crafters.
Seashell Ornaments as Year-Round Coastal Decor and Gifts
While these crafts are highly popular as Christmas items, their inherent aesthetic appeal allows them to transcend the holiday season, enhancing the content’s value by securing year-round traffic. The finished ornaments can be repurposed in numerous ways:
- Year-Round Decor: Displayed hanging from a piece of driftwood, incorporated into a wall hanging, or used as a delicate window decoration.
- Unique Gifting: Used as unique, personalized gift tags for year-round coastal-themed presents, or given as wedding or shower favors.
Framing the seashell ornament diy as a piece of permanent coastal art significantly increases its perceived value and relevance, driving sustained interest beyond the winter holidays.
What is the best glue to use for durable seashell crafts?
For high durability and structural components, especially for stacking or load-bearing joints, 2-part epoxy or strong CA glue is recommended. For attaching decorative elements such as pearls, ribbon, or light embellishments, quick-setting hot glue or a clear-drying craft glue is appropriate.
How do I tell if a seashell is a gastropod or bivalve?
To identify a shell, determine if it is one piece or two. Gastropods are typically one-piece, spiral shells, such as a whelk or periwinkle. Bivalves consist of two halves connected by a hinge, such as a clam or scallop, though they are often found as individual halves on the beach.
How long do seashell ornaments take to dry?
Drying time varies significantly by material. Clear acrylic spray sealer usually requires two hours or more to dry until it is non-tacky. Epoxy adhesives require specific curing times outlined by the manufacturer, typically several hours, while hot glue sets instantly. Always ensure the glue is completely dry before adding the next step or handling the finished diy seashell ornament.


2 thoughts on “7 Amazing Seashell Ornaments DIY: Easy Coastal Crafts”