The “Open Kitchen” Solution
As we approach the holiday season, the kitchen becomes the busiest room in the house. It is also the room that gets cluttered the fastest. If you are struggling with overflowing cabinets or just want to update your space with a modern farmhouse aesthetic, DIY floating shelves for kitchen walls are the perfect weekend project.
Open shelving isn’t just a trend; it’s a practical solution to keep your most-used items plates, spices, and coffee mugs accessible while making your kitchen feel larger and airier. In this guide, we will walk you through building strong, safe, and beautiful shelves that look like they cost a fortune.
Phase 1: Planning and Materials
The difference between a shelf that sags and one that lasts for years is the hardware and the wood choice.
Choosing Your Wood
For a rustic look, standard 2×10 Pine boards are inexpensive and take stain beautifully. For a more modern, sleek look, you might opt for White Oak or Walnut, though these are harder to cut and more expensive.
The Essential Tools List
To ensure your shelves are level and secure, you will need the following:
- Stud Finder: Absolutely critical. You cannot hang heavy kitchenware on drywall anchors alone.
- Power Drill: For driving long screws into the studs.
- Level: While a bubble level works, a Self-Leveling Laser Level is much faster and more accurate for marking long lines across a wall.
- Sander: To smooth the rough edges of the lumber.
Hardware
- Floating Shelf Brackets: For solid wood boards, you need heavy-duty Blind Shelf Supports. These steel rods drill into the back of the wood, making the hardware completely invisible.
Phase 2: The Build Process (Step-by-Step)
Step 1: Locate and Mark Studs
Use your stud finder to locate the wall studs. This is non-negotiable for kitchen shelves that will hold heavy ceramic plates. Mark the center of each stud with a pencil.
Step 2: Prepare the Wood
Cut your lumber to your desired length. If you are using construction lumber (like pine from the hardware store), you will need to sand it thoroughly. Start with 80-grit sandpaper to remove the mill glaze and stamps, then move to 220-grit for a smooth finish suitable for staining.
Step 3: Drill the Bracket Holes
This is the trickiest part. You need to drill holes into the back edge of your wood board that line up perfectly with your wall studs.
- Tip: Use a drill guide or a drill press if you have one to ensure the holes are perfectly straight. If the hole is angled, your shelf will be crooked.
Step 4: Mount the Brackets
Install the Floating Shelf Brackets directly into the wall studs using heavy-duty lag screws. Use your level to ensure they are perfectly horizontal before tightening the final screw.
Step 5: Slide and Secure
Slide your wood board onto the metal rods. It should be a tight fit. If it’s loose, you can wrap a little masking tape around the rod to create friction. Once in place, some brackets allow for a small set screw underneath to lock the wood in place.
Phase 3: Finishing and Styling
Staining and Sealing
Since these shelves are in the kitchen, they will be exposed to steam and grease.
- Stain: Apply your chosen wood stain (Special Walnut and Early American are popular choices for 2025).
- Seal: Apply at least two coats of a water-based Polyurethane. This makes the wood wipeable and protects it from water rings if you put a wet glass down.
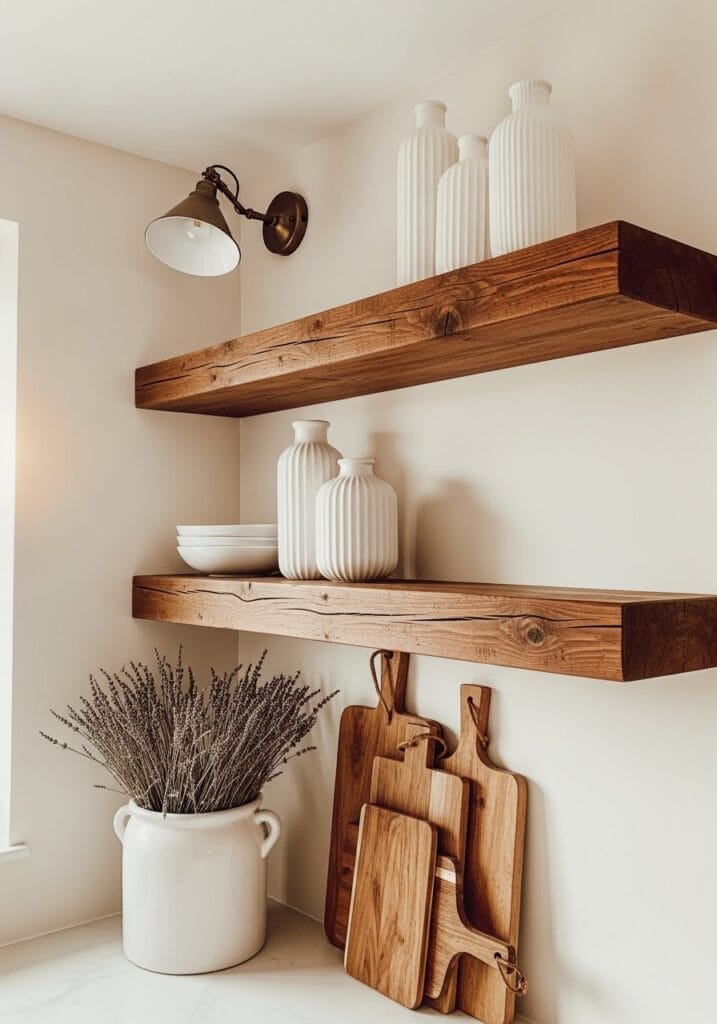
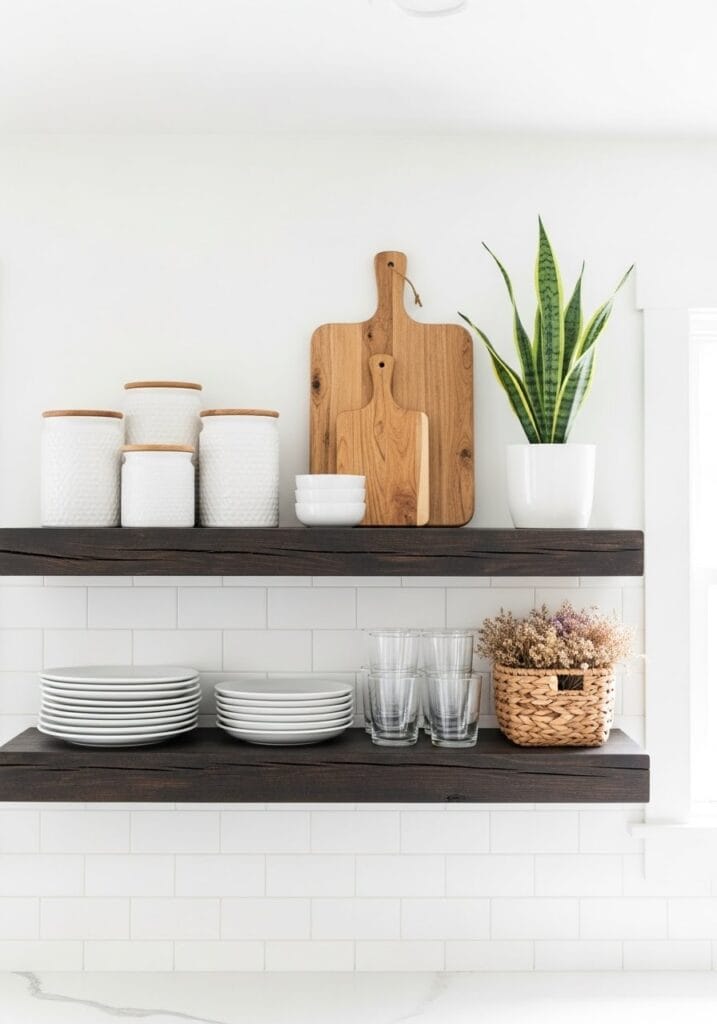
Styling Your Open Shelves
The key to open shelving is balance. Don’t just clutter them.
- Group items: Stack plates in groups of 4 or 6.
- Add texture: Mix ceramic bowls with wooden cutting boards or glass jars.
- Greenery: A trailing plant (like a Pothos) softens the hard lines of the wood.
Q: How much weight can DIY floating shelves hold?
A: It depends entirely on the mounting. If screwed into studs with heavy-duty steel brackets, a floating shelf can easily hold 50-75 lbs, which is plenty for stacks of dinner plates. If you use drywall anchors, limit it to light decor only (under 15 lbs).
Q: What is the best wood for kitchen shelves?
A: Pine is the most budget-friendly and gives a great rustic look. Oak is stronger and more resistant to dents but costs significantly more. Avoid MDF or particle board for the kitchen as they swell with moisture.
Q: How deep should kitchen shelves be?
A: The standard depth is 10 to 12 inches. This is deep enough to hold a standard dinner plate or a mixing bowl without sticking out too far and encroaching on your headspace while you cook.


3 thoughts on “DIY Floating Shelves for Kitchen: 2025 Guide”