Turning Nostalgia into Decor

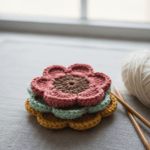
Do you have an old cookie tin filled with mismatched buttons in your attic? Most of us do. Instead of letting them gather dust, turn them into a sentimental masterpiece. A vintage button art DIY project is the perfect way to preserve family history while creating unique wall decor.
You don’t need to be a painter or a sculptor. If you can glue, you can do this. In this guide, we will create a classic “Monogram Letter” framed in a shadow box a gift-worthy project that looks incredibly high-end.
Step 1: The Sorting Process
The success of any vintage button art DIY relies on the color palette.
- The Dump: Spread all your buttons on a towel (so they don’t roll away).
- The Sort: Group them by color.
- The Special Ones: Pick out the “Hero Buttons” the shiny brass ones, the pearls, or the unique shapes. These will go on the top layer.
Step 2: The Background Canvas
Buttons are heavy. Paper won’t work.
- The Base: Use a piece of stiff cardstock or a canvas panel.
- The Texture: For a rustic look, glue a piece of Natural Burlap onto the cardstock. The rough texture contrasts beautifully with the shiny buttons.
- The Outline: Lightly trace your letter (e.g., “M”) onto the fabric using a pencil or chalk.
Step 3: The First Layer (The Fillers)
- The Glue: Use E6000 Craft Adhesive . Hot glue dries too fast and leaves “strings.” E6000 is strong and allows you time to slide buttons around.
- The Base Layer: Glue down your flat, plain buttons first. Fill the entire shape of the letter. Don’t worry about gaps yet.
Step 4: The Second Layer (The Heroes)
This creates the 3D effect essential for vintage button art DIY.
- Overlap: Glue your “Hero Buttons” (Pearls, Metals) on top of the first layer, covering the gaps.
- Tiny Fillers: Use tiny beads or seed beads to fill any remaining small holes.
- Dry: Let it cure flat for 24 hours.
Step 5: The Shadow Box
You cannot put this in a regular frame because the glass will crush the buttons.
- The Frame: Buy a Deep Shadow Box Frame.
- Assembly: Mount your art inside. The depth allows the buttons to shine without touching the glass.
PRO TIP: Cleaning Old Buttons
Vintage buttons are often grimy.
Before you glue:
- Plastic/Glass: Soak in warm soapy water and scrub with a toothbrush.
- Metal: Polish with a jewelry cloth.
- Bakelite/Bone: Be careful! Wipe gently with a damp cloth only. Do not soak.
For identifying rare buttons, check out the National Button Society.
FAQ: Button Crafts
Q: Can I use hot glue for vintage button art DIY?
A: You can, but buttons might pop off over time if the temperature changes. E6000 or Tacky Glue creates a permanent, flexible bond that lasts for decades.
Q: How do I remove the shanks (loops) from buttons?
A: Many vintage buttons have a loop on the back. Use a pair of Flush Cutters to snip the loop off so the button lays flat on your art.
Q: What if I don’t have enough vintage buttons?
A: Buy a “Filler Bag.” Amazon sells bags of Mixed Craft Buttons by color (White/Cream/Gold). Mix these 50/50 with your vintage ones to bulk up the project without losing the look.